Finished Devil Dog Hat!
Finished the commissioned devil dog hat! And got some pictures of the two doggies it was made for!


Upcoming projects: continue granny square blanket, baby diaper covers, baby ladybug sweaters, teddy bear amigurumi
Finished the commissioned devil dog hat! And got some pictures of the two doggies it was made for!
Upcoming projects: continue granny square blanket, baby diaper covers, baby ladybug sweaters, teddy bear amigurumi
Finally finished the baby sweater! I added a white scalloped edging on the sleeves, collar, and bottom to give a little bit of a frilly look.


And here are some pics of the first one I did as I was making it. I used the same pattern for these two.


The yarn I used for the pink/brown one was 3ply versus the 4ply used in the pattern. I added 2 more rows to each section and 5 more double crochet to each row. I also used a 3.75 mm hook versus the recommended 4 mm hook. Hopefully I’ll get some pics of the little girl I made it for wearing it soon!
The pattern was Cat’s One Piece Wonder baby sweater 0-3 months. http://cats-rockin-crochet.blogspot.com/2011/05/cats-one-piece-wonder-baby.html
I plan on making more baby sweaters with booties and hats as a set to sell, so check my etsy page soon if you’re interested!
Upcoming projects: continue granny square blanket, baby diaper covers, baby ladybug sweaters, teddy bear amigurumi
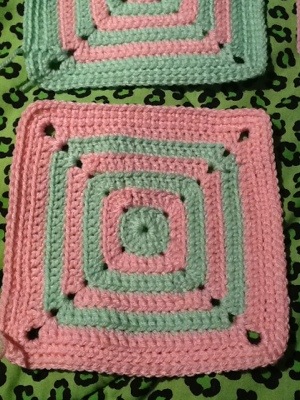
Woohoo! 7 out of 40 squares done!
Here are my most recent 2 🙂


I’m waiting on some more yellow yarn so I’ll be working on the blue and white tomorrow 🙂
Well yesterday my goddaughter was born so I didn’t get too much done, but here’s what I have so far!

I was also commissioned to do a doggie sweater tux with several bow ties. I will have pics of it on the doggie it was made for tonight!


Upcoming Projects: Finish Blanket, 2nd Baby Sweater (Cat’s one piece wonder), Commisioned Doggie Devil Hat
So I know I was planning on doing 2 squares a day for my blanket…. But that might not be totally doable. So here’s what I’ve done so far!

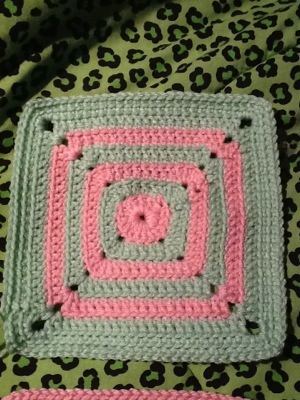
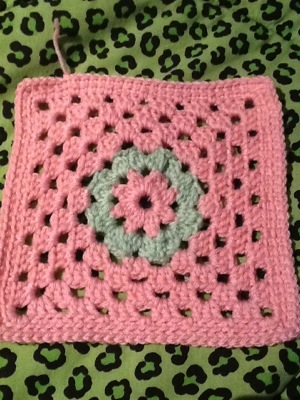
Tomorrow (hopefully) i will finish the pink/green one which it the reverse of the lacy type one (last pic) and begin on the blue/pink squares. Should end up with a total of 40 squares when this is done!
Hey guys! So I started on my granny square blanket today, which I will be working with off and on as I do other projects. Here is a pic of the first granny square I have ever made! The pattern is from a book called 200 Crochet Blocks. I’ll post pics as I complete more and attach them. This wont be a huge blanket so I would say 2 blocks a day for about 3 weeks to finish the entire blanket.

I forgot to take pics of the finished baby sweater I made, but here are the parts as I was working them.

Front panel finished

Front panel and right sleeve

Back panel and second sleeve

(Parts from left to right): Back, sleeve, front panel
I used Deborah Norville everyday worsted weight yarn in baby pink, which was incredibly soft and had a beautiful color/sheen. It’s 100% acrylic so machine washable and dryable which is perfect for baby clothes. I’ll get some pics of Sophie, the baby I made it for, wearing it when she’s born (due in August). I am making one for another friend’s baby in a pink/brown variegated yarn and will post pics on that one finished soon.
Link to free pattern: http://cats-rockin-crochet.blogspot.com/2011/05/cats-one-piece-wonder-baby.html
Thanks for looking!
Upcoming projects: Baby Colored Granny Square Blanket, 2nd Baby Sweater, Commissioned Doggie Tux and Devil Hat
Hey guys! Here are some pics of the Father’s Day hat I made for my Dad. Its in black and gold which are the colors of the college I’ll be attending next year (Go BUFFS!). He’s going to be out of town on the actual Father’s Day so I wont be able to give it to him until middle of next week but hopefully then I’ll be able to get some pics of him in it!

Front view – I didnt add on the strings at the bottom of the ear flaps cus I’m pretty sure my dad will say that theyre too “girly” for him. Haha!

I’m putting up an etsy listing for this hat in custom colors (finished product, not the pattern)!
And here is the etsy link! https://www.etsy.com/listing/102503276/custom-2-color-ear-flap-hat
Upcoming projects: Baby Sweater (Link to free pattern), Baby Colored Granny Square Blanket, Commissioned Doggie Tux and Devil Hat
Here is the pattern for my (renamed) Big Baby Minion!
Yarns Used:
With a US G6/4.00 mm hook, start a magic ring.
BODY:
Start with yellow:
Round 1: 7 sc in magic ring. (7)
Round 2: 2sc in each stitch around. (14)
Round 3: 1 sc, 2 sc in next stitch. Repeat around. (21)
Round 4: 2 sc, 2 sc in next stitch. Repeat around. (28)
Round 5: 3 sc, 2 sc in next stitch. Repeat around. (35)
Round 6: 4 sc, 2 sc in next stitch. Repeat around. (42)
Round 7: 5 sc, 2 sc in next stitch. Repeat around. (49)
Round 8: 6 sc, 2 sc in next stitch. Repeat around. (56)
Round 9: 7 sc, 2 sc in next stitch. Repeat around. (63)
Round 10: 8 sc, 2 sc in next stitch. Repeat around. (70)
Rounds 11-21: 1 sc in each stitch around. (70)
Rounds 22 and 23: Switch to black and 1 sc in each stitch around. Finish off black at end of round 23 and join yellow. (70)
Round 23-32: 1 sc in each stitch around (70)
Round 33: Join blue for the last 10 stitches of round 33. (70)
Rounds 34-37: 10 sc in blue, 16 sc in yellow, 18 sc in blue, 16 sc in yellow, 10 sc in blue. (70)
Rounds 38-41: Finish off yellow, continue in blue. I sc in each stitch around. (70)
Round 42: Beginning of decreasing rounds. 8 sc, 1 dec. Repeat around. (63)
Round 43: 7 sc, 1 dec. Repeat around. (56)
Round 44: Begin stuffing, keep adding as you go. 6 sc, 1 dec. Repeat around. (49)
Round 45: 5 sc, 1 dec. Repeat around. (42)
Round 46: 4 sc, 1 dec. Repeat around. (35)
Round 47: 3 sc, 1 dec. Repeat around. (28)
Round 48: 2 sc, 1 dec. Repeat around (21)
Round 49: 1 sc, 1 dec. Repeat around (14)
Round 50: 7 dec. (7)
Sew last row together to prevent stuffing from coming out.
EYE: (make one OR two)
With black.
Round 1: 6 sc in magic ring (6)
Round 2: 2 sc in each stitch around (12)
Finish off and leave a long tail to sew to white part of eye.
With white.
Round 1: Ch 10, join together with a slip stitch to form a ring. (10)
Round 2: 2 sc in each chain. (20)
Round 3: 1 sc in stitch, 2 sc in next stitch. Repeat around. (30)Switch to grey.
Round 4: 1 sc around. (30)
Finish off and leave a long tail for sewing to body.
Arms: (make two)
In black
Round 1: 8 sc in magic ring (8)

Completed minion! Looks kinda like a baby – so pattern has been renamed to “Big Baby Minion”

Happy boyfriend with his minion. Name Filet (after the steak, filet minion)
Upcoming projects: Father’s Day Ear-flap Hat, Baby Sweater (Link to free pattern)
Hey guys! So I thought I’d show you how my minion has been going so far. I’ve been working on it for 2 days now and its almost done! But I’m currently taking a break to make a father’s day present for my dad :).
So here are some pics from the start to how far I’ve gotten!
Start of the hat, end of increasing rounds. This part will be the top of the head of the minion, its 70 sc around:

Eye band, showing the start and end. This part was covered up with the eye so it isnt noticeable:

Showing my color changes when I started making the pants. I thought it would be quicker to keep the yarns intact and carry them along the inside of the piece rather than finish them off at every color change:
Cut the strings inside and tied them off:

View of minion before starting decreasing rounds:

Finished body stuffed. Eye seam still uncovered:

And this is as far as Ive gotten! I will still add on the arms, legs, finish off the overalls, buy some grey yarn to finish the goggles, and make sure he’s just right! I put him next to a skein to show his size. Its Red Heart Supersaver skein:

I measured him and heres his true size: Height (15″ from first to last row), Width (18″ around)
This is the pattern that I used for the main body, but I will post a completed pattern once hes done as I still havent done the hands and legs!
Yarns Used:
With a US G6/4.00 mm hook, start a magic ring.
Start with yellow:
Round 1: 7 sc in magic ring. (7)
Round 2: 2sc in each stitch around. (14)
Round 3: 1 sc, 2 sc in next stitch. Repeat around. (21)
Round 4: 2 sc, 2 sc in next stitch. Repeat around. (28)
Round 5: 3 sc, 2 sc in next stitch. Repeat around. (35)
Round 6: 4 sc, 2 sc in next stitch. Repeat around. (42)
Round 7: 5 sc, 2 sc in next stitch. Repeat around. (49)
Round 8: 6 sc, 2 sc in next stitch. Repeat around. (56)
Round 9: 7 sc, 2 sc in next stitch. Repeat around. (63)
Round 10: 8 sc, 2 sc in next stitch. Repeat around. (70)
Rounds 11-21: 1 sc in each stitch around. (70)
Rounds 22 and 23: Switch to black and 1 sc in each stitch around. Finish off black at end of round 23 and join yellow. (70)
Round 23-32: 1 sc in each stitch around (70)
Round 33: Join blue for the last 10 stitches of round 33. (70)
Rounds 34-37: 10 sc in blue, 16 sc in yellow, 18 sc in blue, 16 sc in yellow, 10 sc in blue. (70)
Rounds 38-41: Finish off yellow, continue in blue. I sc in each stitch around. (70)
Round 42: Beginning of decreasing rounds. 8 sc, 1 dec. Repeat around. (63)
Round 43: 7 sc, 1 dec. Repeat around. (56)
Round 44: Begin stuffing, keep adding as you go. 6 sc, 1 dec. Repeat around. (49)
Round 45: 5 sc, 1 dec. Repeat around. (42)
Round 46: 4 sc, 1 dec. Repeat around. (35)
Round 47: 3 sc, 1 dec. Repeat around. (28)
Round 48: 2 sc, 1 dec. Repeat around (21)
Round 49: 1 sc, 1 dec. Repeat around (14)
Round 50: 7 dec. (7)
Sew last row together to prevent stuffing from coming out. I will have the rest of the pattern up soon! Also, please do not recreate this pattern, claim it as your own, or use for profit in any way.
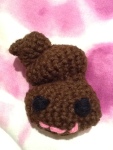
I was browsing the internet for some cute little amigurumi creatures to make for my boyfriend’s brother’s baby (due at the end of the month). And what did i stumble across? An adorable Happy Poo pattern!
While the picture was SO cute, I saw a few in the comments section that just didnt look quite right compared to the original picture, so i decided to try my hand at it. I did count and check, and double check, at least twice each round, but it still just didn’t look 100% right.
I ended up stitching it down on one side to make it look like a leaning tower of poop, which I think made it look a little better. But unfortunately I forgot to stitch on the face until after stuffing it, so please ignore the awkward looking face!


Anyways, I am still working on my Jumbo Despicable Me Minion (with free pattern) and should have some pics up soon!
